
Boys vs Girls vs Teen Underwear: Pattern, Elastic & Construction Differences
The boys girls teen underwear construction differences are not a styling choice — they are garment engineering. A boys’ brief, a girls’ brief and a teen brief that share the same fabric and the same size label are still three different patterns, because each is built around a different body, a different pressure point and a different fit failure. This guide is written from the pattern room, where those differences are decided before a single panel is cut. It covers the 3D pouch and fly opening on boys’ styles, the gusset and leg-opening finish on girls’ styles, the body-transition problem in teen sizing, and the seam and elastic decisions that make or break the fit.
On this page
- Quick answer: why construction differs by gender and age
- Boys’ underwear: 3D pouch, fly opening and waistband tension
- Girls’ underwear: gusset, leg opening and anti-wedgie pattern
- Teen underwear (10–16): the body-transition pattern
- Seam construction: flatlock, bound and overlock explained
- Elastic tension control: waistband vs leg opening
- Fabric choices by segment (and what we stock)
- A construction spec sheet for your manufacturer
1. Quick Answer: Why Construction Differs by Gender and Age
The construction differs because the fit requirements differ. Boys’ underwear needs a shaped front pouch and, on some styles, a functional fly opening. Girls’ underwear needs a correctly positioned double-layer cotton gusset and a leg opening that stays flat against the body. Teen underwear bridges the two as the body changes shape, adding a hidden moisture-wicking liner on some styles. Each is a separate pattern with its own seam and elastic rules.
A common mistake among first-time private-label founders is to treat kids’ underwear as one product in three colourways. It is not. The front panel, the crotch construction, the leg opening and the elastic tension all change between boys’, girls’ and teen styles, and a factory that cuts all three from one block is producing a line that will fit only by accident. The sections below break down exactly what changes in each block and why.
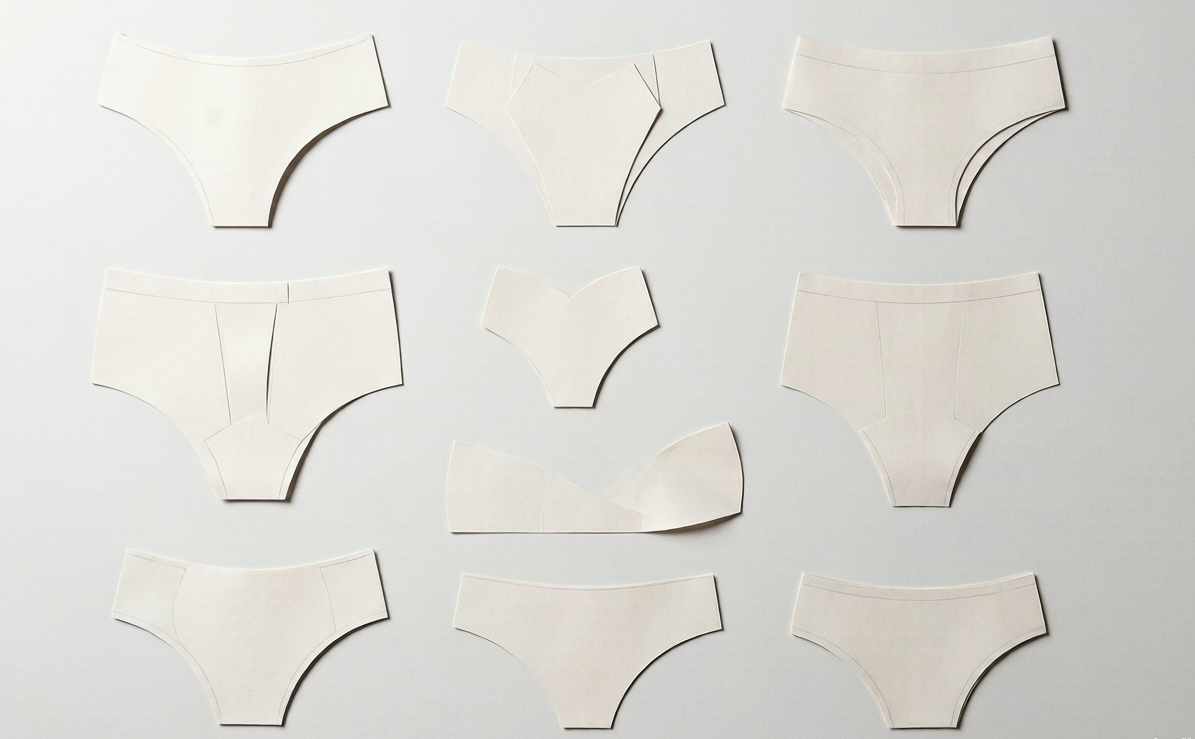
2. Boys’ Underwear: 3D Pouch, Fly Opening and Waistband Tension
A boys’ brief or boxer brief is built around three things a girls’ brief does not have: a U-shaped, two-layer 3D ergonomic pouch that gives front volume without a flat seam pressing against the body, an optional fly opening that is either functional or decorative, and a wider waistband that carries more tension to hold the garment in place through movement.
The front pouch is the defining feature of boys’ underwear and the place most cheap patterns fail. A flat front panel does not fit a boy’s body through a day of running and sitting — it rides, pinches and leaves pressure marks. The correct approach is a U-shaped, two-layer 3D ergonomic pouch, cut on a curve so the fabric forms a shallow front pocket. The two layers spread pressure without adding a hard seam in a sensitive area.
Cutting the pouch correctly is curve geometry. The pouch seam is cut on a bias curve, which lets the knit stretch in two directions and wrap the body. If the curve is too shallow the pouch collapses; if it is too deep the fabric bags — and the correct curve changes with fabric stretch, so a high-stretch modal-spandex base needs a slightly different pouch than a lower-stretch cotton blend.
The fly opening is the second decision, and the first question is functional or decorative. A functional fly is two overlapping panels that open; a decorative fly is a sewn overlay that stays closed. For toddlers and young boys a functional fly adds sewing steps without adding comfort, so many brands run a decorative fly or none at all; for school-age boys it is a preference item. Either way, the overlap must lie flat and not twist after washing — a twisted fly is one of the most common complaints on boys’ briefs.
The waistband on boys’ styles is typically wider than on girls’ — 2.5 to 3.5 cm against 2 to 3 cm — and is usually a jacquard-woven elastic with a brand name. The width is functional: a wider band spreads waist tension over more surface area, which matters when a boy is active. Tension control itself is covered in section 6.
3. Girls’ Underwear: Gusset, Leg Opening and Anti-Wedgie Pattern
A girls’ brief is built around three details boys’ styles do not share: a double-layer cotton crotch gusset that is positioned, not just added, a leg opening finished encased (enclosed elastic) or bound so it stays flat against the leg without digging, and a back panel cut to prevent riding up through the seat.
The crotch gusset is the most misunderstood part of a girls’ brief. It is not a decorative patch; it is a functional double layer — usually pure cotton or a cotton-rich knit against the skin — that sits over the most sensitive area. Two things matter more than the gusset itself: its position and its coverage. A gusset that is too short or set too far back leaves the main-fabric seam sitting where it should not, which is the classic cause of discomfort complaints.
The gusset is cut as a separate panel with the raw edges enclosed, so no overlock edge touches the skin. The cotton inner layer is what matters — cotton next to the skin is what parents expect from a girls’ brief, even when the outer body is a modal or modal-cotton blend.
The leg opening is where girls’ briefs succeed or fail on review sites, because the finish must lie flat against the crease of the leg without binding. There are two standard finishes: encased elastic, where the elastic is folded inside the fabric edge and top-stitched, and bound elastic, where a binding tape wraps and encloses the edge. Encased is softer and lower-profile; bound is more durable. What is never correct is an exposed raw elastic edge, which leaves marks within an hour.
The anti-wedgie pattern is the third piece. The back panel is cut wider through the seat and slightly fuller at centre-back so the garment stays in place during activity. This is a subtle grading decision — a few centimetres of extra fullness in the right place — invisible on a flat lay but obvious after a day of wear. Brands that skip it get “rides up”; brands that overdo it get bagging. The correct amount is validated on a live fit test.
4. Teen Underwear (10–16): The Body-Transition Pattern
Teen underwear is the hardest block to cut because the body is changing, not just growing. From about age 10 to 16, the waist-to-hip ratio shifts, the torso lengthens, and the fit needs of an 11-year-old differ from a 15-year-old in the same height band. Teen styles typically add a hidden moisture-wicking liner and move toward adult construction in the upper sizes.
Between roughly ten and sixteen, a child’s body changes shape faster than it changes height, which breaks the height-based grading that works for younger kids. Two fourteen-year-olds of the same height can have very different waist and hip measurements, so a teen block carries more grading steps in the hip and fewer in the height.
The practical consequence is that the top of your kids’ range and the bottom of a teen range overlap awkwardly: a 150–160 cm block that fits a pre-teen will not fit a developed fifteen-year-old, even at the same height. Most brands solve this with a dedicated teen block in the upper sizes, graded on hip rather than height.
Functionally, teen underwear often adds a hidden moisture-wicking liner — a lightweight inner panel, usually synthetic or a synthetic blend, that sits against the skin and moves moisture during sport. The key word is hidden: the liner is enclosed so the exterior still looks like an ordinary brief or boxer brief. It is a genuinely useful feature for active teens and a differentiator brands can sell without overclaiming.
5. Seam Construction: Flatlock, Bound and Overlock Explained
Kids’ underwear uses three main seam types. Flatlock sews two panels edge-to-edge with a flat, low-profile stitch that sits almost level with the fabric, which is why it is used where a raised seam would rub. Bound seams wrap the raw edge in a binding tape. Overlock finishes the edge with a serger stitch. Each has a job, and choosing wrong is what causes chafing on a child’s skin.
This section is about construction choices, not marketing language. The seam that joins a leg opening or a side panel decides whether the garment rubs — which, for a child wearing it all day, is the difference between comfort and a return. Understanding the three standard seams lets a brand specify construction with confidence.
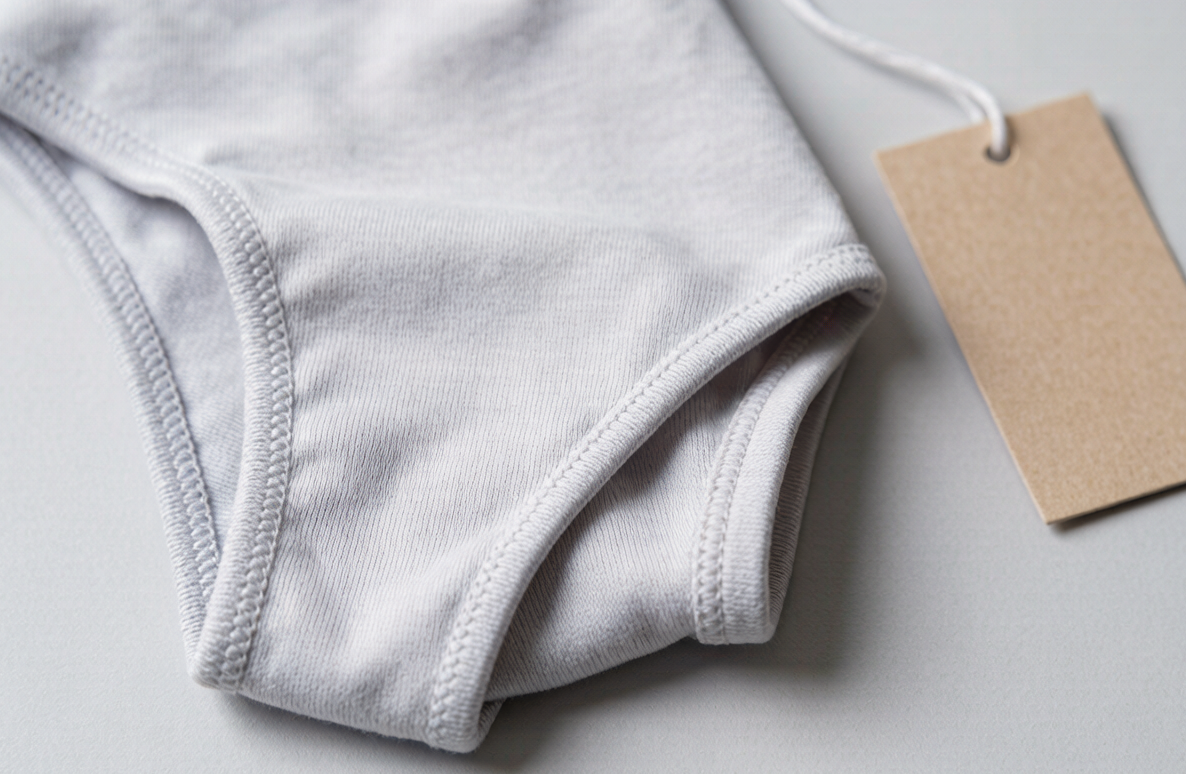
| Seam type | How it is made | Typical use in kids’ underwear | Why it matters |
|---|---|---|---|
| Flatlock | Two panels joined edge-to-edge with a flat stitch, seam lies nearly level with the fabric | Side seams, crotch seams, anywhere the seam touches skin under tension | Reduces rubbing and pressure marks; the default for comfort-led lines |
| Bound | Raw edge wrapped and enclosed in a binding tape, top-stitched | Leg openings, armholes on bodysuits, necklines | Durable, clean edge that resists rolling and adds structure |
| Overlock | Edge finished with a serger stitch, often with a second top-stitch | Internal seams, gusset attachment, economy construction | Fast and low-cost, but a raised edge that can press against skin |
The rule we apply in our own sample room is simple: any seam that sits against skin under load gets a flatlock; any edge that must stay flat and stable gets a bound finish; overlock is reserved for internal joins. The flatlock is the workhorse because it keeps the seam level with the fabric — which is what stops a seam leaving a red line after a day at school, and why a well-built brief feels different from a cheap one even in identical fabric.
6. Elastic Tension Control: Waistband vs Leg Opening
Elastic tension is set differently for the waistband and the leg opening. The waistband carries higher tension to hold the garment up, while the leg opening carries lower tension so it stays in place without digging into the thigh. Getting these two backwards is the single most common cause of red marks and ride-up on kids’ underwear.
Elastic is the hidden engineering of underwear. A brief is a panel of fabric suspended between two elastic circuits — one at the waist, one at each leg — and its comfort is decided by how those circuits are tensioned relative to each other. Set them equal and the garment slips or digs; set them correctly and it disappears against the body.
The waistband and the leg opening do different jobs, so they need different stretch ratios. The waistband must grip enough to hold the garment up through movement — a higher stretch ratio and a firmer recovery. The leg opening must seal lightly against the thigh — a lower stretch ratio and a gentler recovery. A leg elastic that recovers too aggressively is what leaves the red rings parents photograph in reviews.
The working parameters are a relationship between the garment’s relaxed and stretched measurements. The table below shows the tension targets we use per age band; treat them as starting points, because the exact numbers shift with the fabric’s own stretch and recovery.
| Age band | Waistband width | Waistband stretch ratio | Leg opening stretch ratio | Fit goal |
|---|---|---|---|---|
| Toddler (2–4) | 2.0–2.5 cm | Gentle (low tension) | Very gentle | No marks, easy on and off |
| School age (5–9) | 2.5–3.0 cm | Firm (holds through play) | Gentle (below waist tension) | Stays up, no thigh marks |
| Pre-teen/teen (10–16) | 2.5–3.5 cm | Firm | Gentle-to-moderate | Adult-like hold, no digging |
The practical lesson for a brand is to specify tension as a requirement, not a hope. A tech pack should state the waistband stretch ratio, the leg-opening stretch ratio, and that the leg tension must run below the waist tension. When you sample, measure both elastics at rest and fully stretched, and compare the recovery. This is exactly the kind of detail our six-stage QC checks in bulk, because a leg elastic that drifts tighter in production is a defect that only appears after the first wear.
7. Fabric Choices by Segment (and What We Stock)
Boys’, girls’ and teen lines can share a base fabric, but each segment leans on it differently. A high-stretch modal-spandex interlock suits everyday briefs and boxer briefs across all three; a modal-cotton blend adds a cotton feel for girls’ lines where the gusset and hand-feel matter; and teen styles often want the same base with a synthetic wicking liner. Cotton-only programs are a custom development line, not an in-stock option.
Fabric is where construction and cost meet, and it is worth deciding the base before you finalise patterns, because the stretch and recovery of the fabric change the pattern geometry. Our two in-stock bases cover most kids’ underwear programs without a setup fee:
- 91.9% Lenzing™ Modal / 8.1% Spandex interlock, 220–240 GSM — a soft, high-stretch, high-recovery base with no cotton and no setup fee, our default for briefs and boxer briefs across all three segments.
- 49.9% Lenzing™ Modal / 43.3% Cotton / 6.8% Spandex interlock, ~220 GSM — an in-stock modal-cotton blend that adds a cotton hand-feel while keeping modal’s stretch, ideal for girls’ lines where parents expect a cotton touch.
A pure cotton or cotton-led blend is available as a custom fabric development line, not an in-stock option. Cotton knits stretch and recover differently from modal-spandex, so a cotton program needs its own grading and fit validation — a real cost and timeline difference. That is why brands should lock the base fabric before the size chart: the two decisions are inseparable.
For teen styles, the base fabric stays the same but the construction adds the hidden moisture-wicking liner from section 4. The liner is a separate inner panel, so it changes only the pattern and the sewing sequence, not the outer fabric spec.
8. A Construction Spec Sheet for Your Manufacturer
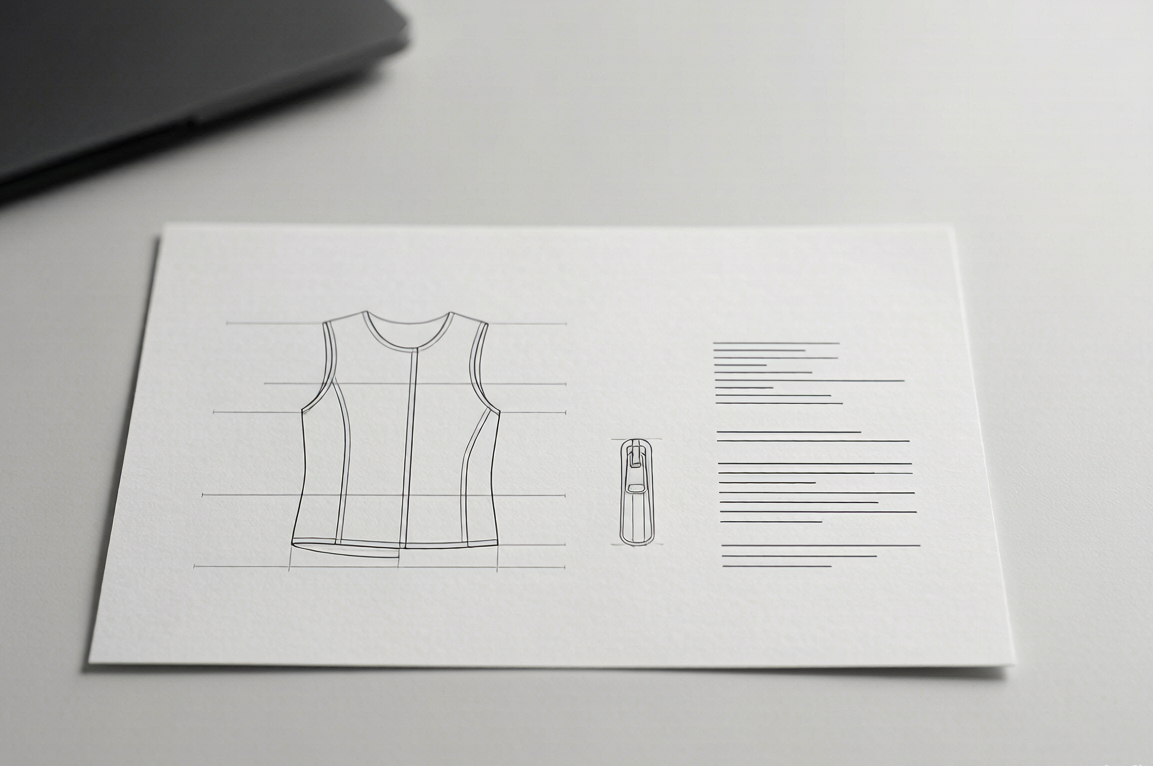
A construction spec sheet should lock, per style: the front panel construction (pouch, fly or gusset), the seam types on every seam, the elastic width and tension for waist and leg, the base fabric and GSM, and the compliance requirements. Hand this to a factory and you remove the ambiguity where fit failures come from.
Most construction problems in kids’ underwear are not skill problems; they are specification problems. The factory and the brand assume different things about the pouch, gusset or elastic, and the difference only shows up on the fit sample. A short, explicit spec sheet closes that gap before the first pattern is cut.
- Front panel: for boys, specify the pouch as a U-shaped two-layer 3D ergonomic pouch and state whether the fly is functional or decorative. For girls, specify the gusset as double-layer cotton, with its length and position.
- Seams: list each seam and its type — side seam flatlock, crotch flatlock, leg opening bound or encased, gusset edges enclosed.
- Elastic: state the waistband width and stretch ratio, the leg-opening width and stretch ratio, and the requirement that leg tension runs below waist tension.
- Fabric: name the base fabric, composition and GSM, and whether it is in-stock or a custom development.
- Compliance: record the safety standard (GB 31701 Class A for children’s sizing) and the current status of any material certifications.
At Nuohua Garment, we work from a spec sheet exactly like this on every private-label program — it is how we hold a pattern consistent across reorders and keep the defect rate below 0.3% through a six-stage QC process with needle detection on every order. Stock-fabric programs start at 2 pcs on selected in-stock styles, colors and sizes, while MOQ is confirmed after reviewing fabric composition, GSM, yarn count, size range, artwork, print method, construction and other customization requirements, so you can lock the construction on a small first run and scale once the fit is proven.
Ready to lock the pouch, gusset, seams and elastic on your boys’, girls’ and teen underwear line? Send us your target styles and base fabric, and our team will return a construction spec sheet and sampling plan.